7 Science Experiments You Can Do at Home That Spark Curiosity: Easy and Engaging DIY Projects
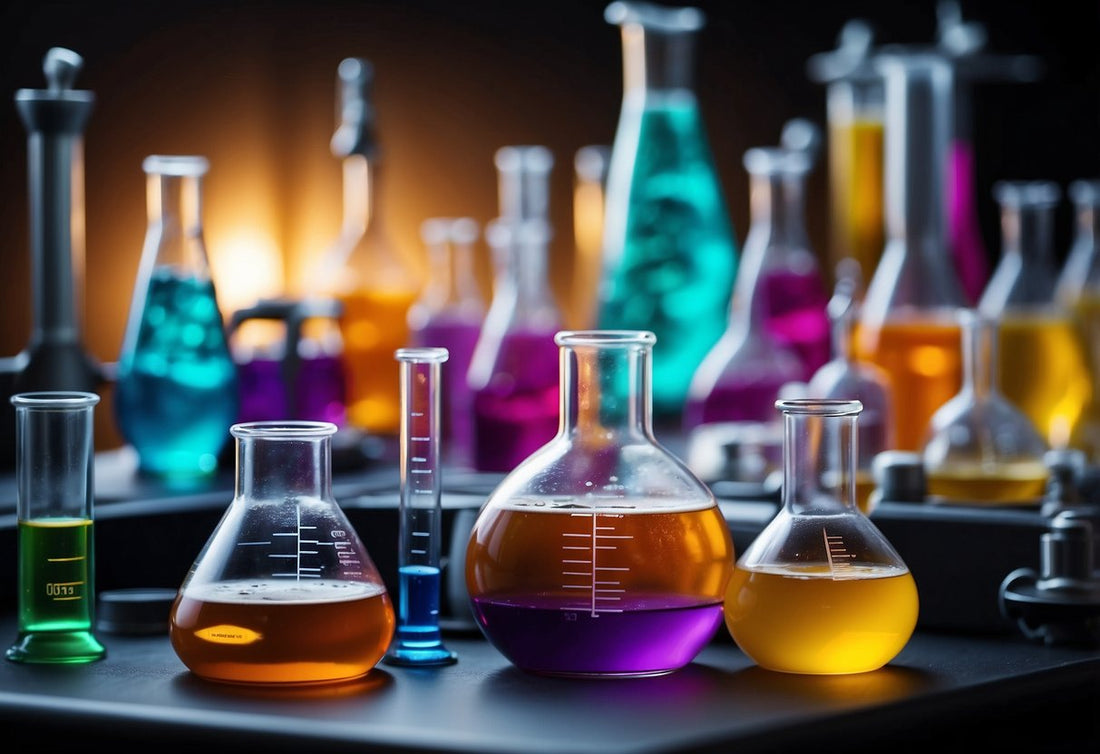
Science experiments offer fascinating ways to explore the world around us. You can conduct many engaging experiments using common household items, making scientific discovery accessible to everyone.

These simple yet intriguing experiments can spark curiosity and inspire a deeper interest in science. By trying them at home, you'll gain hands-on experience with scientific principles and develop critical thinking skills. The experiments cover various scientific fields, providing a well-rounded introduction to the wonders of science.
1) Volcano Eruption with Baking Soda and Vinegar
Create your own mini volcano and watch it erupt right in your kitchen. This classic experiment is simple yet exciting, perfect for sparking curiosity about chemical reactions.
To start, gather these materials: baking soda, vinegar, a small container, red food coloring, and a tray or plate. Shape a volcano mound using clay or playdough around the small container.
Fill the container halfway with baking soda. In a separate cup, mix vinegar with a few drops of red food coloring. When you're ready for the eruption, pour the vinegar mixture into the baking soda.
Watch as the "lava" bubbles and flows down the sides of your volcano. The reaction between baking soda (sodium bicarbonate) and vinegar (acetic acid) produces carbon dioxide gas, creating the fizzy eruption effect.
You can experiment with different amounts of baking soda and vinegar to see how it affects the eruption intensity. Try adding dish soap to the mixture for extra foaminess.
This experiment demonstrates acid-base reactions and gas formation in a visually appealing way. It's a great introduction to basic chemistry concepts and volcanic processes.
2) Create a Simple Circuit with a Battery and LED
Building a simple circuit is an exciting way to explore electricity. You'll need a battery, an LED light, and some wire to get started. Connect the positive end of the battery to the longer leg of the LED using a wire.
Then, attach another wire from the shorter LED leg to the negative battery terminal. Watch as the LED lights up, demonstrating the flow of electricity through your circuit.
You can experiment by adding a switch to control the light. Insert a small button or paperclip between one of the wires and the battery terminal. Press it to complete the circuit and illuminate the LED.
Try using different battery voltages or multiple LEDs in series. Observe how this affects the brightness of the light. You can also add resistors to control current flow and protect the LED from burnout.
This hands-on experiment helps you visualize electrical concepts. It's a great starting point for learning about circuits, conductivity, and energy transfer. With these basics, you can move on to more complex electronic projects.
3) Make Slime with Glue and Borax
Creating slime is a fun and easy experiment that demonstrates polymer science. You'll need white glue, borax, water, and food coloring.
Start by mixing 1/4 cup of water with 1/4 cup of white glue in a bowl. Add a few drops of food coloring and stir well.
In a separate container, dissolve 1/2 teaspoon of borax in 1/2 cup of warm water. Slowly pour this solution into the glue mixture while stirring constantly.
Watch as the slime forms before your eyes! The borax acts as a cross-linking agent, connecting the polymer molecules in the glue to create a non-Newtonian fluid.
Knead the slime with your hands until it reaches the desired consistency. You can adjust the texture by adding more glue for a stretchier slime or more borax solution for a firmer result.
Experiment with different colors and glitter to create unique slimes. Store your creation in an airtight container to prevent it from drying out.
This simple experiment teaches you about chemical reactions and polymer formation while providing a tactile, hands-on experience.
4) Crystal Growing Experiment
Growing crystals at home is a fascinating way to explore chemistry and geology. You can create beautiful structures using common household items. This experiment allows you to witness the process of crystallization firsthand.
To start, you'll need sugar or salt, water, a glass jar, and a piece of string or a wooden stick. Dissolve the sugar or salt in hot water until no more will dissolve. This creates a supersaturated solution.
Pour the solution into the jar and suspend the string or stick in it. Place the jar in a quiet spot where it won't be disturbed. Over the next few days, you'll see crystals begin to form.
As water evaporates from the solution, it becomes even more concentrated. This causes the dissolved molecules to come out of solution and attach to the string or stick, forming crystals.
You can experiment with different variables to see how they affect crystal growth. Try using different substances, changing the temperature, or adding food coloring to create colorful crystals.
This experiment demonstrates principles of solubility, saturation, and crystal formation. It's a great way to observe how molecules arrange themselves into intricate structures.
5) Egg in a Bottle Trick
The egg in a bottle trick is a classic science experiment that demonstrates air pressure principles. You'll need a hard-boiled egg, a glass bottle with an opening slightly smaller than the egg, and matches or a lighter.
Begin by peeling the hard-boiled egg. Light a match and drop it into the bottle, then quickly place the egg on top of the bottle's opening. As the flame consumes oxygen inside the bottle, it creates a partial vacuum.
Watch as the egg gets sucked into the bottle! The higher air pressure outside pushes the egg through the opening. This happens because air molecules constantly exert force in all directions.
To remove the egg, tilt the bottle upside down and blow into it. The increased air pressure inside will push the egg back out. This experiment showcases how air pressure differences can create surprising effects.
You can try variations of this experiment using different sized bottles or eggs. Always exercise caution when handling matches or lighters, and supervise children during the activity.
6) Invisible Ink with Lemon Juice
Create secret messages with this classic experiment. Squeeze lemon juice into a bowl and dip a cotton swab or small brush into it. Write your message on white paper using the lemon juice.
Let the paper dry completely. The message will become invisible once dry. To reveal the hidden writing, hold the paper near a light bulb or other heat source.
As the paper heats up, the lemon juice will oxidize and turn brown, making your message visible. This works because the acidic lemon juice weakens the paper fibers.
You can also try this experiment with other liquids like milk, vinegar, or apple juice. Each will react differently to heat. Test them out to see which works best for your secret communications.
This simple activity demonstrates chemical reactions and introduces concepts of oxidation. It's a fun way to explore basic chemistry principles while creating "magic" messages.
7) Rainbow in a Glass with Sugar
Create a vibrant rainbow display using common household items. You'll need sugar, water, food coloring, and a clear glass.
Start by preparing different colored sugar solutions. Mix sugar and water in separate containers, adding a different food coloring to each one.
Pour the densest sugar solution (usually the one with the most sugar) into the glass first. Carefully layer the other colors on top, starting with the next densest and working your way up to the least dense solution.
As you add each layer, pour it slowly over the back of a spoon to minimize mixing. The varying sugar concentrations create distinct layers that won't mix easily.
Observe how the colors stay separate, forming a beautiful rainbow effect in the glass. This experiment demonstrates density and how liquids with different concentrations interact.
You can experiment with different sugar amounts and colors to create unique rainbow patterns. Try adding glitter or using different shaped containers for varied visual effects.
Benefits of Home Science Experiments
Home science experiments offer valuable learning opportunities and foster a love for discovery. They provide hands-on experiences that can spark lifelong curiosity about the world around us.
Educational Value
Science experiments at home reinforce concepts learned in school. You can explore topics like chemistry, physics, and biology in practical ways. These activities help you understand scientific principles more deeply than textbooks alone.
Experiments also teach you the scientific method. You'll learn to form hypotheses, conduct tests, and analyze results. This critical thinking process is useful in many areas of life.
Home experiments often connect to real-world applications. You might learn how batteries work or why plants need sunlight. This relevance makes the learning more engaging and memorable.
Encouraging Curiosity
Doing experiments at home nurtures your natural curiosity. You'll ask questions like "Why does this happen?" or "What if we tried this instead?" This inquisitive mindset is crucial for scientific thinking.
Experiments can reveal the wonder in everyday phenomena. You might discover the hidden colors in black ink or observe how water behaves in different states. These insights can spark a lifelong interest in science.
You're free to explore topics that fascinate you most. This self-directed learning is highly motivating and can lead to deeper engagement with scientific subjects.
Hands-On Learning
Home experiments provide tactile experiences that enhance understanding. You'll manipulate materials, observe changes, and see cause-and-effect relationships firsthand.
This hands-on approach caters to different learning styles. Visual learners can see reactions unfold. Kinesthetic learners benefit from physically interacting with materials.
You'll develop important lab skills through practice. Measuring, mixing, and following procedures are valuable abilities in many fields. These skills also boost confidence in your ability to tackle scientific challenges.
Safety Considerations

Prioritizing safety is crucial when conducting science experiments at home. Proper precautions ensure an enjoyable and educational experience while minimizing risks.
Supervision and Assistance
Adult supervision is essential for most home science experiments. Children should never conduct experiments alone. An adult can guide the process, explain safety measures, and intervene if needed.
Assist younger children with handling materials and following instructions. Older kids may require less direct involvement but should still have an adult nearby.
Always read through experiment instructions together before starting. This helps identify potential hazards and ensures everyone understands the steps involved.
Proper Use of Materials
Use protective equipment like safety goggles, gloves, and aprons when appropriate. These items shield against splashes, spills, or accidental contact with materials.
Handle chemicals and other substances with care. Follow instructions for diluting or mixing precisely. Never substitute ingredients without researching potential reactions.
Keep work areas clean and organized. Store materials properly between uses. Label containers clearly and keep them out of reach of young children or pets.
Dispose of waste materials safely according to local regulations. Some substances may require special handling or disposal methods.
Emergency Preparedness
Keep a first aid kit easily accessible in your experiment area. Make sure it's well-stocked and includes items specific to potential experiment-related injuries.
Know basic first aid procedures for common accidents like minor burns, cuts, or chemical splashes. Have emergency contact numbers readily available.
Install a fire extinguisher nearby and learn how to use it properly. For experiments involving heat or flammable materials, keep a fire blanket on hand as well.
Identify the nearest water source for quickly rinsing eyes or skin if exposed to irritants. Consider keeping a bottle of sterile eyewash solution in your supplies.